Valentine’s Day Nail Art
Can you believe that we’re not only in the year 2015 but that Valentine’s Day is right around the corner? Sheesh, where does the time go? It’s fun to get all festive for this lovely holiday and what a better way to do it than with your nails! I have compiled 10 different Valentine’s Day nail art tutorials that you’ll not only love but that I know you could do yourself! Check them out!
Reverse Hearts
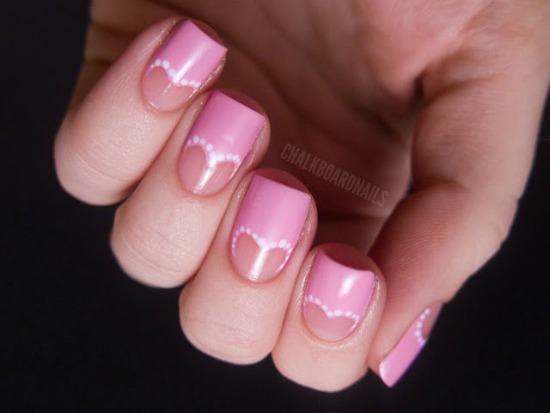
This reverse heart shaped nail art comes from Chalkboard Nails. It might seem difficult, but after reading through it, I’m sure even I could make this happen. All you need is some tape and nail polish! Check it out here.
Simple Hearts

I love everything about this manicure. It’s simple which makes me think I could do it. The colors are fun and very Valentine’s Day-esque without being too crazy. And it’s cute! Talk about an all around win for Valentine’s Day nail art! You can find the full tutorial here.
Candy Hearts
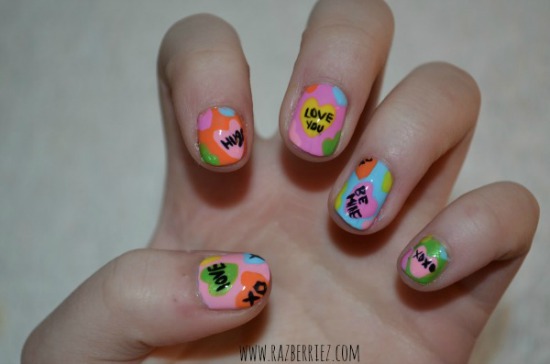
This one takes a little more time and effort, but follow this tutorial on your teenage daughter and you’ll be the coolest mom on the block! She’s got a step-by-step tutorial on her blog that really simplifies it and as it turns out, it’s a lot easier than it looks!
Chevron Pink Hearts

You know those hole punch reinforcer things? I’m pretty sure that’s what they’re properly called… You just use those and some nail polish to create these cute heart nails! Three different shades of pink and you’re ready for Valentine’s Day! Find her tutorial here.
Black Heart Nails
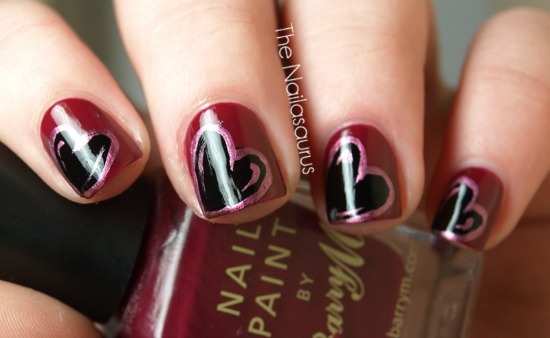
Maybe bright pinks aren’t your thing. No worries, we’ve gotcha covered with these black heart nails. Of course you could use any colors for this tutorial but I really love that it’s a little different!
Gradient Pink Shimmer
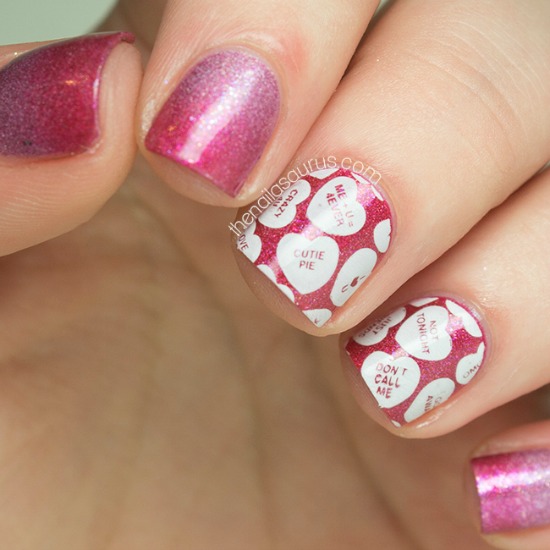
Now it looks like we’re getting into some more serious stuff here, doesn’t it! Over at the Nailasaurus she shares this tutorial for these cute candy heart nails. She uses stickers here but if you just want a simple gradient manicure, she’s got a tutorial for that here!
Cut out hearts
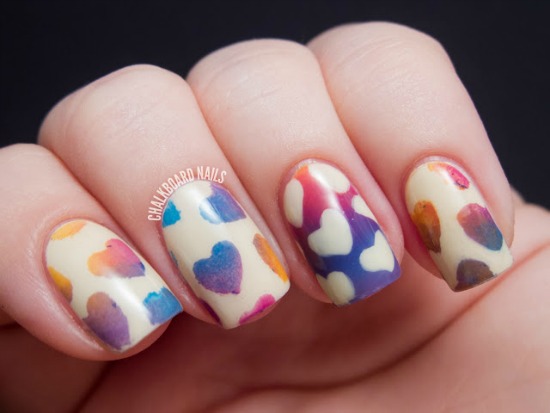
I love these! My first thought was seriously? This has got to be so hard. But when I checked out this post on how to do the cut outs, it’s actually so easy! And genius! You can find these beauties here and the tutorial for the cut out nail art here.
Bad Romance Nail Art
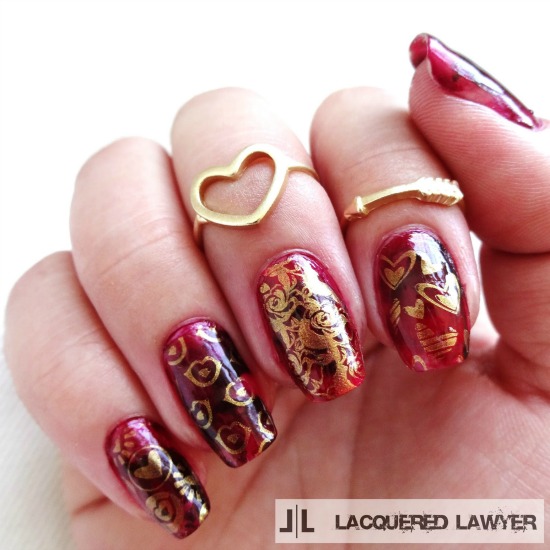
This is another one I looked at and thought there was no way I could do this. That shows how how creative I am in the nail department! I’m lucky to get one color! She’s got a step by step tutorial and then applies little stamps at the end to create the gold overlay. Genius!
“Love is Black and White” Nail Art
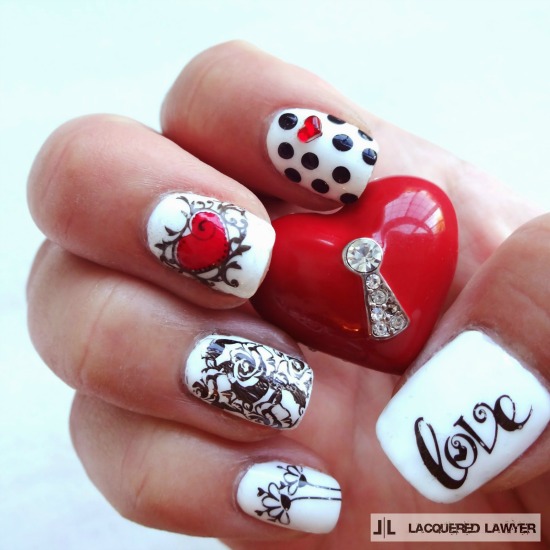
Now we’re getting into the really creative stuff here. I mean look at these babies! But, like the others, they aren’t as hard as you think. She uses stamps to create the beautiful overlays and writing. The polka dots, however, are all her! Find her tutorial for these nails here.
Red Kisses Nail Art
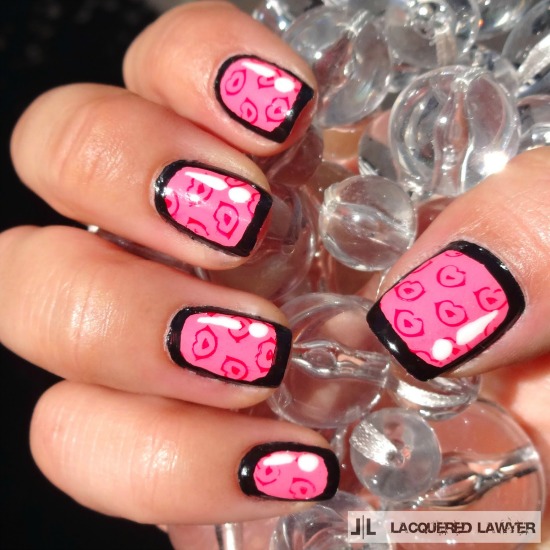
As I was reading through the steps for this Valentine’s Day nail art, I saw that it said to use white and add “shine.” It took me a second to realize that the white exclamation point wasn’t actually shine but polish! I love the black with the pink and reds, it makes it a little different. So fun! You can find this tutorial here.
So what do you think? Which of these are you going to give a try this Valentine’s Day? I think I might start with something simple, although I’m feeling mighty inspired like I might be able to do some of these!
CONTINUE READING IN THE BEDROOM
PIN IT FOR LATER:
