DIY Raised Garden Beds

A few years ago my husband and I decided to take a small space in the very corner of our yard and transform it into a raised garden. The space was already fenced in, because once upon a time it contained some grass and a small plastic playground where I could corral my four small children to play.
As it turns out, the kids area was never used much. It had an annoying plot of lawn that needed to be mowed. My mother suggested I turned it into a raised bed garden and immediately I knew that this was the perfect useful solution to the corner space of unused property in my yard.Three reasons why raised garden beds are a great for my family because:
Three reasons why raised garden beds are a great for my family because:
1) Fruit from the grocery store generally leaves me wanting more. And it is expensive – especially organic produce. The raised garden beds provide us fresh fruit and vegetables all year round for a family of six.
2) It’s important for kids to get their hands directly in the soil and be involved in the process of learning where our food comes from.
3) I have total control over my garden so I know there will not be chemicals. The debate continues on whether GMO is bad for consumption, but it doesn’t matter in my garden because there is no GMO.
The process of building your own raised garden is simple. I will break down the building of a garden in six simplified steps.
Step 1: Designing The Garden
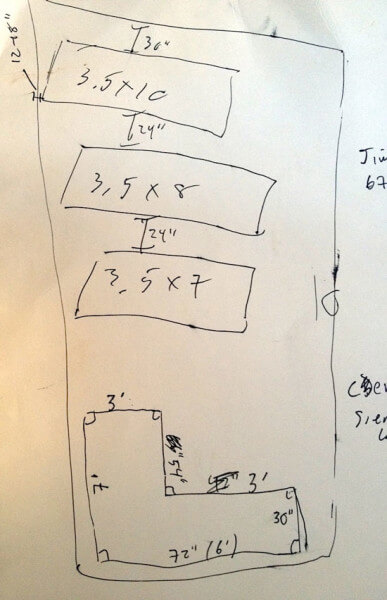
First we needed a design for an odd shaped space in our yard where the garden would grow. We brought in our neighbor who is an engineer to help conceptualize the best use of space. He designed four raised box planters to maximize the space.
Step 2: Choosing The Materials
The choices you make here will dictate whether you spend $200 or $1,000. Cheap lumber or natural redwood. Nails or galvanized screws? Irrigation or hand water? We decided to go for quality in materials, which cost us more money.
- We opted to use untreated redwood planks that is more expensive but redwood is known to withstand weather and the test of time. Treated redwood looks prettier, but you don’t want the chemicals of the treated wood seeping into your beautiful organic garden.
- Galvanized screws are more expensive than the alternative but will last longer and are worth the investment. Nails will rust over time.
- Mesh for the bottom of the boxes to prevent animals from coming up and eating our plants.
- Gravel to layer below the mesh to help with drainage.
- Irrigation adds to the cost of the project but offers a lifetime of convenience to your garden.
- Many online blogs suggest concrete to cement the posts into the ground. We found this time-consuming step unnecessary so we opted not to do this and it has worked out great.
Step 3: Building simple boxes
We took a simple approach to building our boxes screwing three six inch planks to 4×4 posts gave us a solid structure and ample height for our garden.

Step 4: Dirt Matters
We splurged with our soil and chose Super O organic soil. With the organic soil, we also added in one half of a bag of Llama manure to each raised bed as a fertilizer. The cost difference between using fill dirt and good organic soil was several hundred dollars. This is where you can save money because non-organic fill is dirt-cheap.
Step 5: Watering System
My husband did a lot of research on whether to use a drip system or sprinklers or nothing at all. There is plenty of debate on the best approach to watering a garden. WE built an irrigation system that would allow for micro-sprinklers or drip depending on the needs of our garden.
Step 6: Planning The Plants
Find a local nursery that will talk to you about your climate and which plants will do best together in a raised bed.
Here is what we came up with:
Bed #1: The Bruschetta Bed. This bed is made of six tomato plants. There are heirloom tomatoes, little Sungold tomatoes, and a big prolific beefsteak tomato. In between all of the tomatoes are basil and parsley plants.
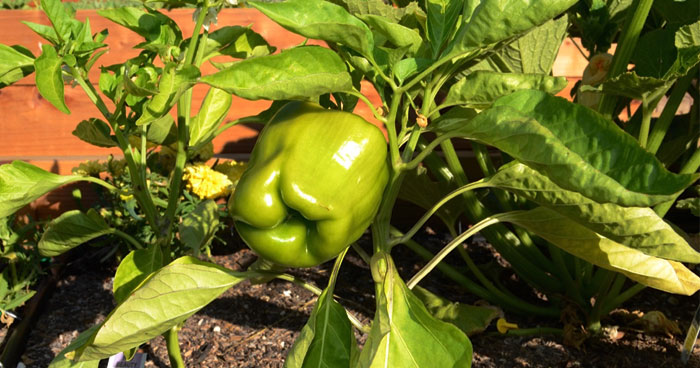
Bed #2: The Vegetable/Pepper Bed. This bed has cucumbers and zucchini; red and yellow bell peppers, and a jalapeño plant.
Bed #3: The Melon Bed. This bed has two watermelon plants and two cantaloupe plants. We couldn’t plant too many in this bed because the melon plants spread and get very big.
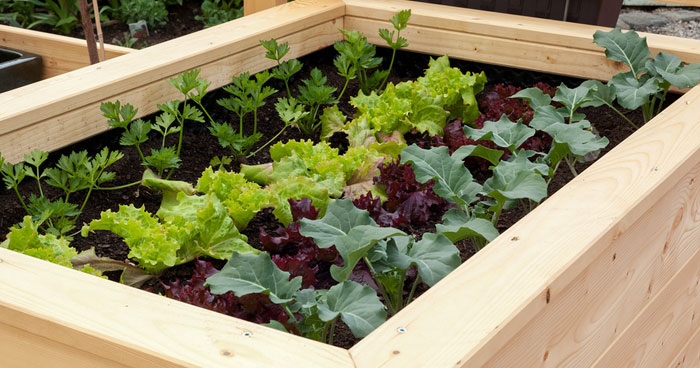
Bed #4: The Bean, Corn and Butter Lettuce Bed. I planted 12 corn stalks and four bean vines in this bed. I filled in some empty space along the edge of the box with six butter lettuce plants.
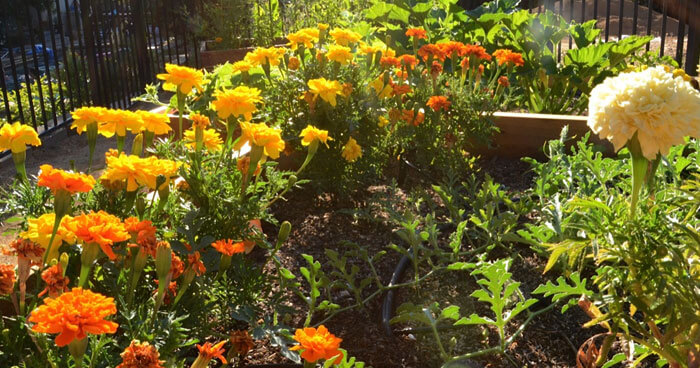
Each bed has a marigold plant in each corner for a natural way to keep insects off of my fruits and vegetables.
There is something exhilarating about growing your own organic fruits and vegetables. Every time I see a new bud about to burst into its fruit, it reminds me of life, health and self-sufficiency. The entire project cost around $1,000 from start to finish. You can definitely build your own raised garden for cheaper, but we are happy with the end result.
It’s well known that the healthiest and most sustainable way to buy produce is to buy local. It doesn’t get more local than your own backyard. Find some unused space in your yard, rip out that water-wasting lawn and build yourself a raised bed garden.

This post was written by Megan Woolsey exclusively for BonBon Break Media, LLC.
CONTINUE READING IN THE BACKYARD
You May Also Like:
 Winter Gardening : Preparing the Garden for Winter Wildlife by Growing Green Fingered Kids
Beguiling Plants by May Dreams Garden
Winter Gardening : Preparing the Garden for Winter Wildlife by Growing Green Fingered Kids
Beguiling Plants by May Dreams Garden
 How To Pick Your Vegetable Seeds Without Going Crazy by Northwest Edible Life
 Fountains Make Splash at 2013 Northwest Flower and Garden Show by Seasonal Wisdom
Powered by YARPP.